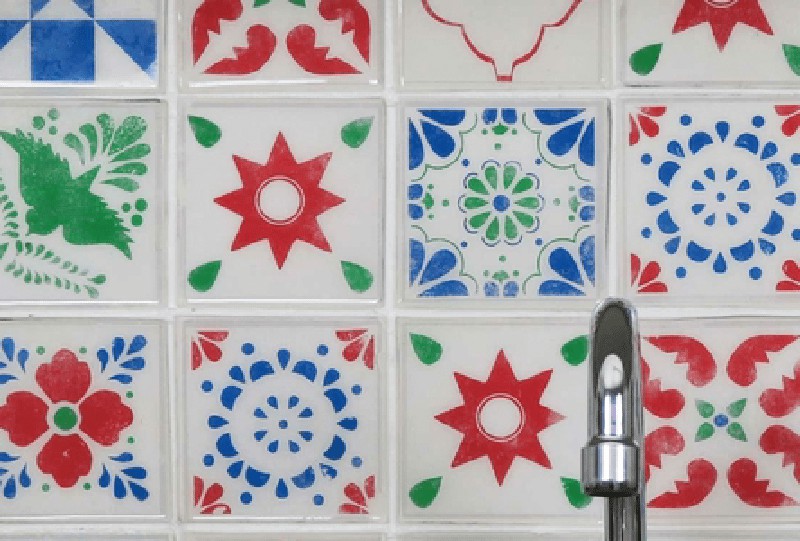
An original backsplash with hydraulic tiles
If you are looking to add an innovative touch to your kitchen decor, we suggest creating a backsplash with handmade hydraulic tiles. This project is a great way to personalize your kitchen with a unique and original design.
Materials and tools you'll need:
- Varnish
- Photo transfer
- White enamel
- 10x10 cm wooden squares
- A wooden board the size you want to tile
- Sandpaper
- Paintbrush
- Silicone
Step 1: Paint the wood
Start by painting all of the wooden squares with white enamel. This will serve as a base for the designs you'll apply later. Make sure you cover the entire surface well and let it dry completely before continuing.
Step 2: Choose your designs
It's time to select the designs you want to transfer to the tiles. There are many options, from geometric patterns to more custom images. We recommend printing your designs on a laser printer for the best quality. Once you have your prints, cut out each design and apply a generous layer of photo transfer to the printed side.
Step 3: Transfer the designs to the wood
Place each design on a square of wood, making sure to press down well so it adheres properly. Allow it to dry completely, or if you prefer to speed up the process, you can run an iron over a rag covering the tiles for a minute. Then, wet the surface and begin to gently rub to remove the cellulose layer. The goal is to leave only the transferred design on the wood.
Step 4: Protect and age the design
To protect the design you've transferred, apply an additional thin layer of photo transfer. If you're going for a more vintage look, you can add a bit of cellulose in some areas to simulate natural wear and tear, which will give the tiles an antique feel.
Step 5: Vitrification
This is a crucial step to give your tiles that shiny, vitrified look. Tape the edges of each piece to form a raised edge and prevent the varnish from spilling over. Mix the finish glass varnish (two parts component A and one part component B) and carefully pour it over each tile until the entire surface is covered. Allow to dry for 24 hours (or 48 hours in cold environments) so the varnish hardens and takes on a glass-like finish. Once dry, sand the edges for a more polished finish.
Step 6: Laying the tiles
To lay the tiles, use a wooden board as a base. Fix the tiles to the backsplash using mounting adhesive or white glue, making sure that they are evenly distributed. If you want to create the appearance of joints, leave a small gap between the tiles using painter's tape. Then, fill these gaps with silicone and remove the tape once the silicone has set.
Step 7: Installation in the kitchen
Finally, with all the tiles already fixed to the backsplash, you can install your new backsplash in the kitchen. Use mounting adhesive on the back of the backsplash to fix it to the wall. Once installed, your kitchen will have a unique and personality-filled hydraulic tile backsplash.
This DIY project is not only original, but also allows you to customize your kitchen to your liking, creating a unique and decorative space. Dare to try it!
Other related articles
 Feb. 3, 2025
How to light your paintings so they stand out better
The right lighting can completely transform the way a painting is perceived … Jan. 31, 2025
How to drill holes in tiles? Tips and tricks for perfect drilling
Drilling a hole in a tile may seem like a simple task, … Jan. 28, 2025
Types of screwdrivers and their uses
The screwdriver is one of the most common and versatile hand tools, … Jan. 27, 2025
How to connect your Garza devices to a 2.4 GHz Wi-Fi network?
If you have Garza smart devices and are having trouble setting them … Jan. 24, 2025
Our customers trust us
Opinions of our clients
Receive our news