Have an extra socket on the wall
Increasing the number of outlets in your home is an easier task than it seems, even if you have no experience in electrical work. Replacing a single socket with a double socket will allow you to have more connection options without resorting to power strips. Follow these steps and you will be able to have that extra socket you need so much.
Materials needed:
- Double-socket power strip
- Voltage tester screwdriver
- Multi-purpose screwdriver
Step 1: Disconnect the power
Before starting any electrical project, it is essential to turn off the power at your home's electrical panel. This step is vital to avoid any risk of electric shock. Once you are sure that there is no electricity in the area where you will be working, you can safely proceed.
Step 2: Remove the old socket
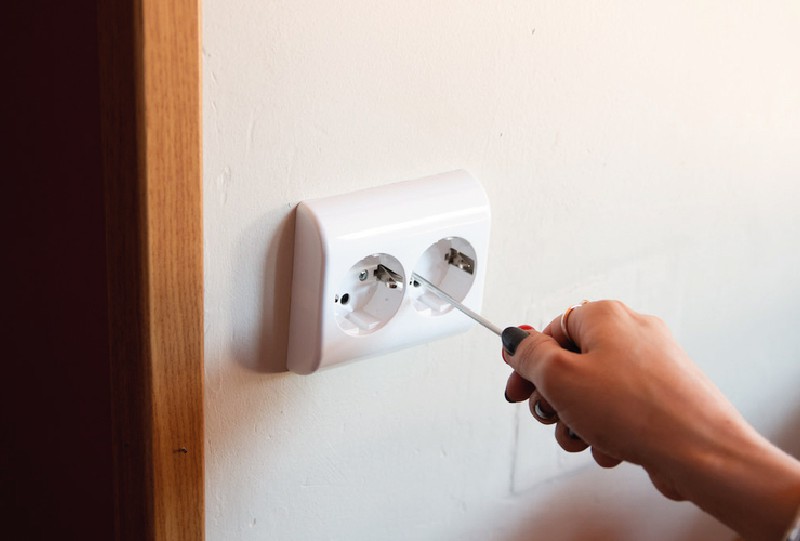
With the power disconnected, start by removing the old socket. First remove the trim, which is the decorative outer part, and then remove the base where the wires connect. Use the screwdriver to unscrew the screws that hold the wires to the base. Carefully pull out the wires to avoid damaging them.
Step 3: Install the new socket
Take the new double socket and loosen the screws to separate the pieces. The first thing you need to identify is the ground wire, which is usually the middle of the three wires coming out of the wall. Next, put in the other two wires: the phase, which usually goes on the left, and the neutral, which connects to the right. Insert each wire into its corresponding hole in the socket and make sure they are securely fastened by tightening the screws.
Step 4: Secure the socket to the wall
Once the wires are connected, place the socket into the recessed box on the wall. Screw the base of the socket in place so that it is securely fastened, making sure that the top and bottom screws are properly tightened. Next, place the trim over the socket and screw it back in place to secure everything in place.
Step 5: Check that everything works
With the double socket now installed, turn the power back on and check that it works properly. This simple change will allow you to have an extra connection point without the need for power strips.
Now you know how to add another socket to your wall quickly and easily. You don't need to be a DIY expert or have complex tools.
>> See all mechanisms <<
Other related articles
 March 11, 2025
How to use a jigsaw like an expert
If you're wondering what the best way to cut with a jigsaw … March 10, 2025
How to choose a drill according to your needs
The drill is one of the most common and essential power tools … March 7, 2025
Features of a drill: how it works
If you're a DIY enthusiast, you probably already have a drill in … March 6, 2025
How to change a switch
Sometimes, when a switch stops working or wears out with use, we … March 4, 2025
Our customers trust us
Opinions of our clients
Receive our news